


Bleed, Margins & Crops
- geminidigitalcolour
- Dec 20, 2018
- 2 min read

Understanding bleed and crop marks when designing for print can be daunting if you have never done it before. Bleed is when the artwork is extended beyond the working area of your design. Generally 3mm is the minimum amount of bleed your document should have. This is to avoid any unwanted white borders when the print is trimmed to size. Take a look at the diagram below:

The dotted red lines represents the 3mm bleed outside of the document. The artwork on the document should reach the edges of the bleed. The blue border represents the documents margins. Margins are also an important aspect of preparing your design for print, and is used so that your content i.e text is not too close to the document edge. Having text or other objects close the the edge runs the risk of it falling of the page when trimmed.


Illustrated above is the same A4 document, one without bleed and one with 3mm bleed. Once bleed has been added to an A4 document the dimensions should be 303mm x 216 mm (3mm bleed on every edge). Adobe's InDesign software makes it easy to set up your document including adding bleed, margins and the page size. To add bleed you simply use the bleed box and add 3mm to the top, bottom, left, and right sides of the document. Below is an image to illustrate how bleed is added in InDesign:

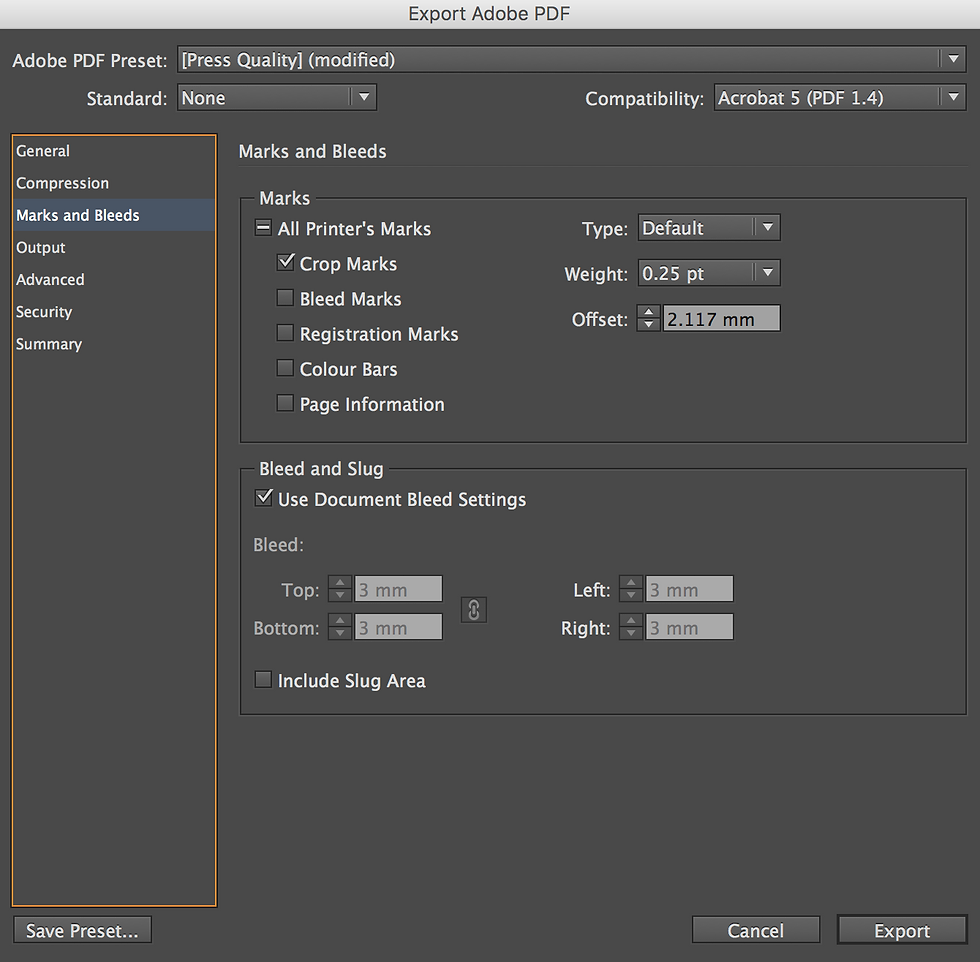
Crop marks are used to indicate the final size of the print and where the document is to be trimmed. Adding crop marks in InDesign is straight forward. Once you have finished your design and are ready to export it to a PDF format select File > Export > Marks & Bleeds > Crop Marks.

If you require more information or help on setting up your document ready for print please get in touch by using our contact form.


Comments